Who is ready for SPRING? Me...I AM! This little project is so fun and easy and is the perfect little touch of happy spring colors.
OK, so this project is so easy (and SUPER CHEAP) it does not technically need a DIY Class. But thought I would share the idea anyway. Lets get started...
You can find these adorable circle playing cards and spool of bakers twine
at Michaels in the $1 bins! Yes, $1 each! The only other supply you will need is some double sided tape.
Start by laying a card down with the pretty side facing down. Roll out some bakers twine over the center of the card.
Place 2 pieces of double sided tape over the bakers twine.
Place a second card with pretty side up on top of the previous card so that the twine and tape are sandwiched in the middle.
Move about 2 inches down on the bakers twine and repeat the process again...and again...and again...and again.
You will have a circle banner ready in no time!
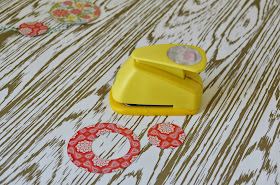
To get the look with some circles smaller, I just used a circle punch. This is not a necessary step, but does add some detail if you happen to have a hole punch on hand. Just alternate the large and small circles.
I love using these banners for so many things. Holiday & party decor or to add a little pop to a piece of furniture or a room.
Here is one I used on a sweet chalkboard!
GUESS WHAT?!?! I have a FREE set of 4 circle card packs and bakers twine for one LUCKY reader! And you do not have to just be local to win this. This will be sent to any winner within the USA!
You have two ways to win! You can choose one or do both for multiple entries.
1. "PIN" any picture from this blog.
2. Comment on this post letting us know what kind of projects you want to see.
Once you have completed these, use the rafflecopter below to enter.
a Rafflecopter giveaway


That is so cute! and so simple!
ReplyDeleteADORABLE! Peyton is going to love this! :)
ReplyDeleteI want to see how you get your letters to be so perfect on your chalkboards!!
ReplyDeleteI agree with the chalkboard letters! I would love to see a tutorial on how to write on a chalkboard and get results similar to yours. Also tips on using chalk paint would be great too! I am so excited to complete this homework assignment!
ReplyDeleteLOVE THIS!!! What a fun touch it adds to the chalkboard.
ReplyDeleteNikki! I didn't realize you were the Funky Junk girl. Oh my goodness! I don't know if you remember me, but my husband, Jay, and Mark were good friends at LU (Mark was Jay's RA when he was a sophomore), and then Mark coached our sons' basketball team through TRBC a couple years ago. It's so fun to finally figure this out! LOL!
ReplyDeleteI LOVE everything that you are doing! And this DIY university is such a great idea. Thank you so much for sharing your ideas with us. I'm just learning about chalk paint, so I would love some tutorials on painting furniture and getting it as smooth as you do. The furniture you have a Studio Eleven is amazing! Thanks so much! I hope you are having a great snow day today! :)
You are so talented! I would also like to see how you do your chalkboard lettering or maybe a Silhouette tutorial. I already did your book wreath for my son's school's library and they LOVED it!!
ReplyDeleteI feel like this is an adorable craft I could totally do. Love it!
ReplyDeleteI would love a Silhouette 101 - project based tutorial! Thanks!
ReplyDeleteI agree I would love to learn how to do the chalkboard lettering so it looks good. Also, I love the party table you made.
ReplyDeleteThis comment has been removed by the author.
ReplyDeleteI would like to see a chalkboard lettering tutorial. Yours always look so great!!
ReplyDelete